When our daughters went off to college, I made sure that they each had a sewing basket stocked with the basics to take with them. But this past fall, when we were getting things ready for our son to go off to college, we searched but we couldn’t find any sewing baskets that didn’t have flowery prints or some other girly design and then in the rush to get everything else done and him settled into dorms, the sewing basket got forgotten.
After I got back home though I started to brainstorm a way to make him a sewing kit that wouldn’t take up much space (storage is limited in dorm rooms) and wouldn’t be too girly. One day while going through and sorting the school supplies, I got looking at all the binders from past school years and wondering what to do with them all. Some were barely used and could be donated to the local high school, but then there were the ones that our artists and their friends had embellished with markers. What to do with those? They were still good binders.
And then the idea formed. At least one binder could be turned into a sewing kit for our son.
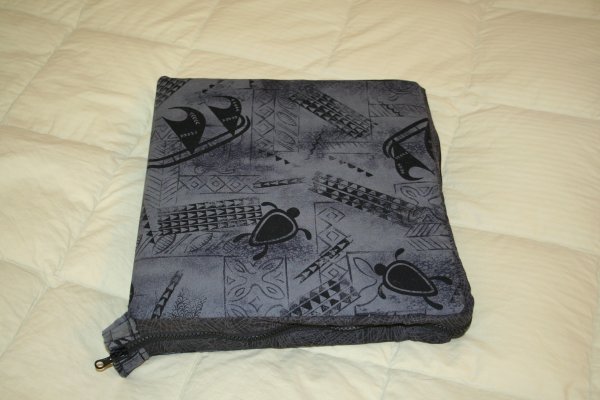
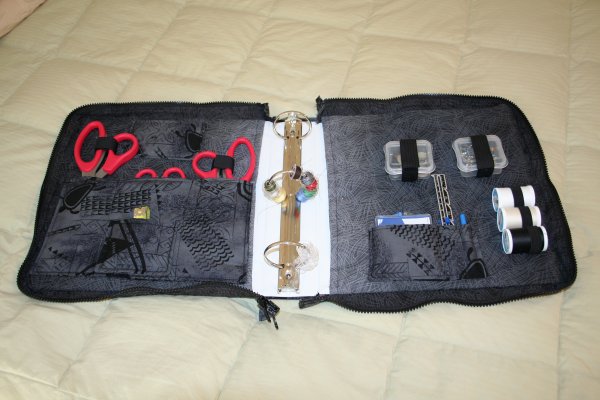
Using scraps of fabric leftover from making my husband an Aloha shirt, I designed and constructed a zippered binder cover with pockets on the inside panels to hold a set of good quality sewing scissors and various other sewing accessories.
As I was making this on the fly… not really sure how it would turn out, I didn’t bother to take pictures as I went along. I don’t have a tutorial to give you but I do have several pictures of the completed sewing kit to share. The rest of the post will be picture intensive.
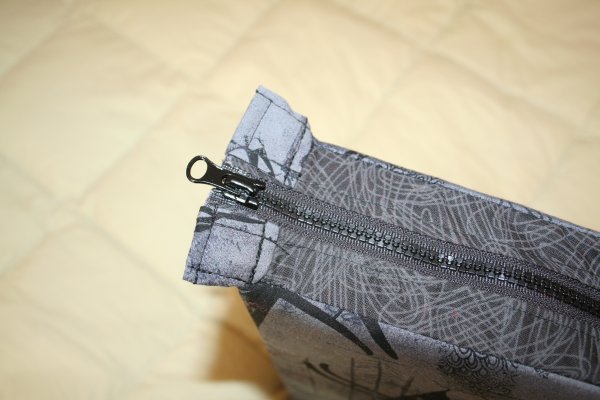
The most difficult part of this whole project proved to be installing the zipper. I had thought that I could sew the ends of the zipper to the binder cover but when I did that, the binder wouldn’t open completely. So that got unpicked and I sewed small squares of fabric to the zipper ends. This actually turned out to be an ideal solution as this provides a “handle” to grab onto when taking the binder off of a shelf. It also indicates which is the bottom of the binder so that the sewing kit doesn’t get put away upside down.
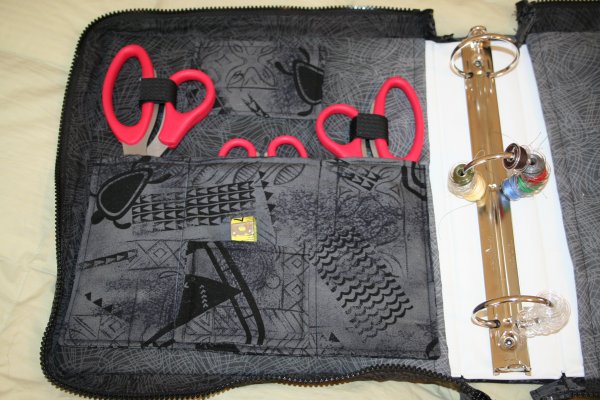
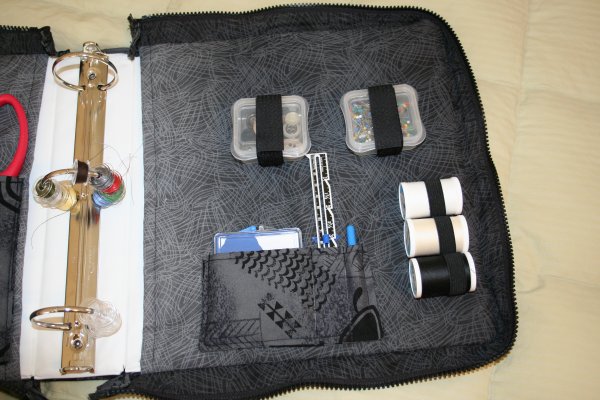
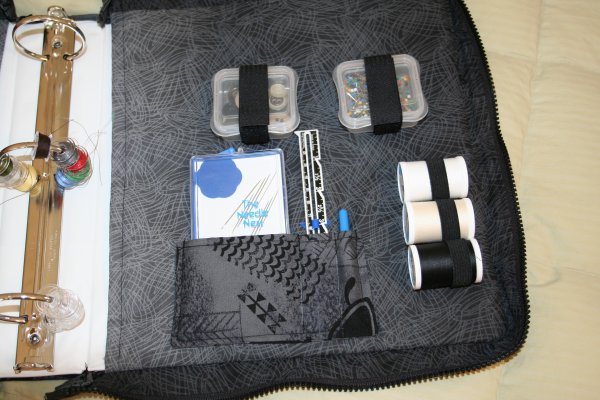
A box of pins and a box of miscellaneous buttons are held in place with velcro strips.(<-affiliate link) The three spools of thread in the basic colours of white, black and beige are held with loops of elastic. Then to give him more colour choices for mending and sewing on buttons, I wound bobbins in several different colours and slipped them on the binder rings to keep them organized.
Hiding inside that bottom pocket… to the left is a magnetic needle keeper kit with various sized needles and a needle puller. Just barely peeking out of the right side of that pocket is a seam ripper
. (<-affiliate links)
Once I figured out how to make the zipper closure work, the rest of the construction went smoothly and I’m really pleased with the way it turned out.
A zippered binder sewing kit is a great gift and not only for young people going off to college for the first time. They would also make a unique and useful wedding gift. Even non-sewers should have a basic sewing kit to be able to perform simple mending tasks such a sewing on buttons, restitching hems and other small clothing repairs.
Although I wasn’t able to do a tutorial… if you want to make one these zippered binder sewing kits either for yourself or as a gift and have any questions, please feel free to ask in the comments and I’ll do my best to answer.
This post contains affiliate links. For more information please check my Disclosures and Disclaimers page. It doesn’t cost you any extra, but it does help support this site.



6 Comments
Mary
December 29, 2018 4:34 pmWas wondering how you attached the zipper. If you could send instructions that would be greatly appreciated.
Beth
July 19, 2016 5:17 pmHow did you do the piece that the zipper is attached to? Is it one long straight piece? Can you please send me instructions? Thanks!
Libby
December 22, 2011 3:40 pmI’m trying to figure out how to do this on a quietbook I’m making for my 2 1/2 year old! Would it be too much to get a step by step email from you?!? Thank you so much!! Have a Merry Christmas!!
Michelle
March 3, 2011 6:34 pmWhat a wonderful post! This will keep hands out of my sewing box and give them their own — love it!!! FYI – I actually ran across this post because I am trying to create a zippered cover for a 4-inch coupon binder & ran into the same issue with the zipper 🙁 I’ll keep working at it.
nancy
February 22, 2011 7:43 pmAwesome! It is a great idea for we unfortunates who do not have a dedicated sewing space.
Little Wonders’ Days
January 31, 2011 2:49 pmThis is a great idea! So easy and convenient to store and use when needed.
Comments are closed.