This past Christmas, Dave and I decided rather than buying each other gifts, we’d take that money and buy a reading chair for the corner of our bedroom. It took us a while to find a chair that would be comfortable for both of us; short enough for me, tall enough for him. We finally found one in February, but decided to keep looking since it was a bit over what we had wanted to pay. Of course, when we went back to buy that chair because we couldn’t find any others that worked for us, it had already been sold.
We had to order a new one and wait the 6 to 10 weeks for it to come in. The chair arrived last week and it fits perfectly in the corner by the window.
We already had a small round table to use for a side table, but it looked just a tad bit shabby next to our brand new chair. So last week, I got busy and sewed a pretty round tablecloth to cover it. Read on for the instructions for this simple sewing project.
To calculate the size the tablecloth needed:
Note: specific measurements for my tablecloth are in italics.
First, measure the diameter of the table. Ours measured 20 inches.
Next, measure the height and double it. Ours measured 23 ¾ inches. Doubled that comes out to 47 ½ inches.
Then if turning under ¾ inch for the hem, add 1 ½ inches.
All together: 20 + 47 ½ + 1 ½ = 69 inches. Just to give myself some wiggle room, I added an extra inch. Meaning I needed a piece of fabric 70X70 inches, which also meant I had to piece the fabric.
So next, I had to calculate the size of panels I would need:
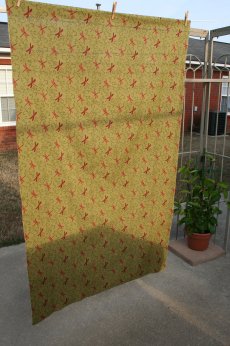
After preshrinking and trimming the selvedges, my fabric was 42″ wide. I cut one panel 70″ long.
I knew I would need 1 inch for seam allowances (1/2″ for either side). That would leave the center panel 41 inches.
70 – 41 = 29 inches needed to be added. Which meant that two 14 ½ inch panels needed to be added to either side. Adding ½ inch to each panel for a seam allowance, gave me a final measurement of 15″.
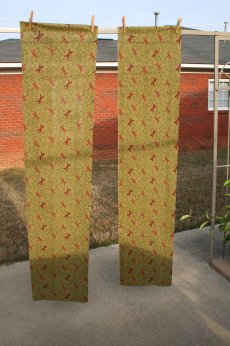
I, then, cut a second piece of fabric 70″ long. From that I cut two 15″ wide panels.
To make a nice finished seam I chose to sew a princess seam:
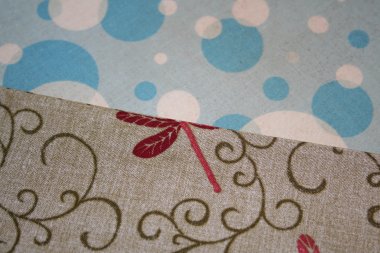
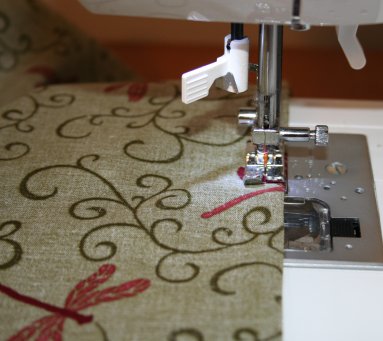
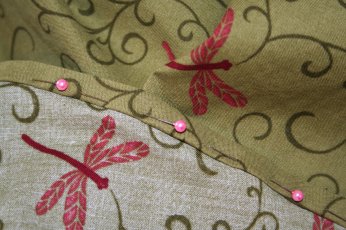
Pin one of the narrow panels to the big panel, wrong sides together. Sew a scant ¼” seam.
Trim seam slightly to get rid of any frayed threads. Press seam to one side. Turn the fabric right sides together and press seam flat.
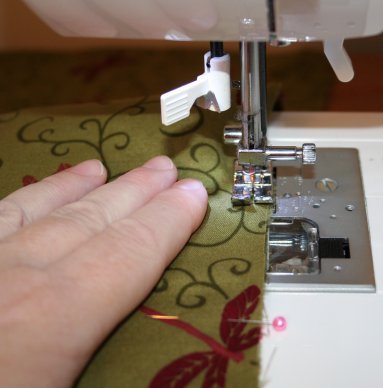
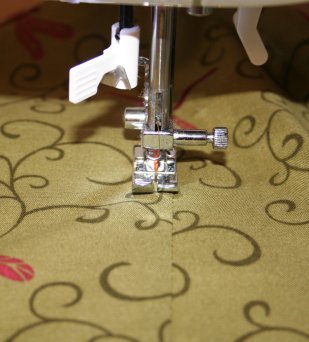
Sew using a full ¼” seam.
Press finished seam toward small panel. Topstitch in place.
Repeat for second small panel.
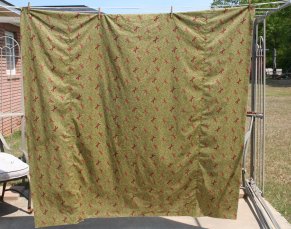
My completed piece of fabric measured 70X70 inches.
To cut the circle:
Fold fabric in half lengthwise and in half again. Doing this gave me a 35X35 inch square.
Smooth the fabric so that it is laying flat with as few wrinkles as possible.
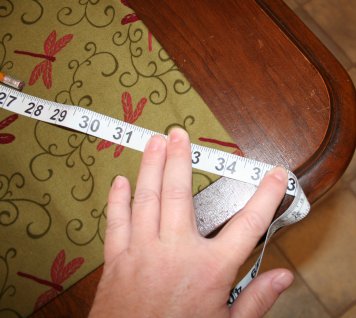
Place your measuring tape at the folded corner. To obtain a 69″ circle, I place it at 34 1/2 inches.
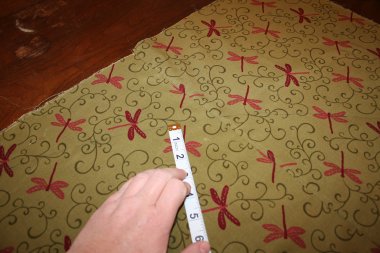
Next smooth the measuring tape out flat. Don’t stretch it. With a pencil, mark the ¼ arc of your circle. Move the measuring tape along the arc, while being careful to keep the correct measurement always on the folded corner.
I made tiny marks several places along the arc and then filled in with a solid line.
Before cutting, pin the layers of fabric together just inside the line. This will prevent the layers from shifting while cutting.
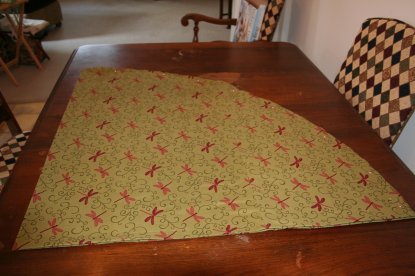
Cut along the drawn line through all layers of fabric.
Remove the pins.
I now had the 69″ circle, I needed to fit my table.
For the hem:
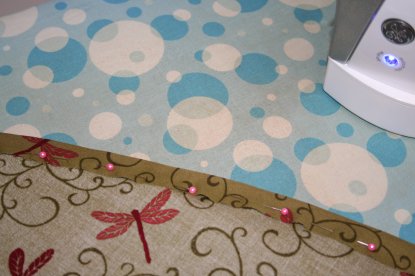
Turn under ¾”. Pin and press all the way around.
As the pins are removed, turn under the raw fabric edge until it meets pressed fold and then re-pin.
Sew. Press completed tablecloth.
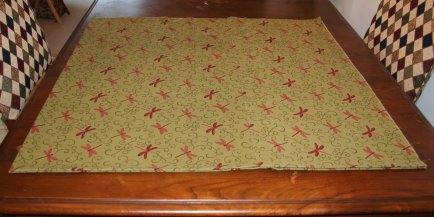
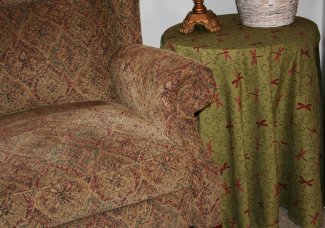
This is what my finished tablecloth looks like:
If you would like to make your own round tablecloth and need help understanding my instructions or making your own calculations, please feel free to leave a question in comments and I will do my best to answer.



19 Comments
Kyley
November 2, 2015 4:25 pmThis may be a silly question..so when you say height do you mean from the floor to the top of the table? Or the the thickness of the table top?
Melanie B
July 26, 2012 1:32 amI am considering making table cloths for my wedding reception instead of buying, but it seems like a lot of work if I want to make 8 of them in the next month. How long did it take you to make, from start to finish, one table cloth? On a very tight budget, but not sure if making them would be cheaper than buying them (and worth the time put forth making them).
admin
July 26, 2012 7:40 amHello Melanie,
Congratulations on your upcoming wedding!
I certainly understand about being on a tight budget. 30 years ago when Dave and I planned our wedding we were on a very tight budget too. We couldn’t even afford to have it catered so family members cooked turkeys and roasts and various side dishes and rolls and served it buffet style. My mom even baked our wedding cake though we did pay someone to decorate it for us.
Anyway… enough of my memories…
It’s been over two years since I made the tablecloth in my post, so I not exactly sure how long it took to make it but it wouldn’t taken more than an afternoon. Whether it would be most cost effective to make them or buy them would depend on how much you had to pay for the fabric to make them.
I don’t know if you’d be open to something like this but you can often buy good quality white sheets at a thrift store and because sheets are so big, you would be able to eliminate the need to join the pieces of fabric and just cut the large circle out of the sheet. This would greatly cut down on how long it would take to make them. And if you had a serger (or know someone who does), instead of doing the rolled hem that I did on the one I posted about you could simply serge the edge of the circle to finish the edges. Perhaps even use whatever colour thread to match the colours you’ve chosen for your wedding.
Doing the tablecloths that way would probably take less than an hour to cut out and then serge the edges.
If you don’t feel comfortable using thrifted sheets you might be able to find some at a good price at a discount department store.
Best wishes with much Aloha,
Sue
Janell
March 9, 2012 1:23 amI plan to make a round tablecloth for an accent table, but I want to add piping to the bottom. I just realized that I’ll either have to line it or or bias tape on the inside bottom edge. I really don’t want to go through the trouble of lining but also don’t want a hem stitching to show if I use bias tape. Any ideas?
supermom
March 9, 2012 6:27 amHello Janell,
The only thing I can think of to avoid having to line the tablecloth or use bias tape, is to insert the piping into the hem of the tablecloth itself, as you are hemming it. To make that possible… when you’re sewing the hem, switch from your regular presser foot to a zipper foot so that you can sew along the edge of the piped hem.
Janell
March 9, 2012 8:47 pmThanks for the quick reply. I did think of that but I don’t think it will give me the nice look that the biased fabric cover of the cording will give me. I think I’ve talked myself into lining it. After all the time and expense the cost of the lining and time to make it won’t add much more trouble.
Leann Bennett
February 18, 2012 7:40 pmThanks for the great instructions! I am making a 60″ round cloth for a customer and this is the first one I have ever made. I am supposed to line it and am a little concerned about the hem line-also about how the two fabrics will “stay together” and not “pouf” or get mis-shapened if you know what I mean! Do you pre-wash the fabric for shrinkage? Thanks!
supermom
February 18, 2012 9:57 pmHello Leann,
Yes, I always pre-wash all fabric.
Since you are lining the tablecloth… what you could do so that the fabrics don’t shift as much… is after you have the two pieces sewn together and turned right-side out… topstitch 1/4″ from the edge.
Carol
January 6, 2012 1:25 pmJust got a sewing machine for Christmas. Totally new to sewing. Thought I’d make a tree skirt for next year. It will be 60″ round with a round cut-out in the middle of 18″ diameter to accommodate the tree stand. I understand your directions but I am concerned about folding the round edge to do the edge seam. Isn’t that difficult since it is curved? Also, I can see that at the larger 60″ diameter it might only be buckled in some parts but for sewing the center 18″ hole edges, any suggestions? Do I cut out little triangles or something periodically so it will fold around the tight curve?
supermom
January 7, 2012 4:21 pmWhat a fun gift to get for Christmas!
For the tree skirt… what you could do is cut out two tree skirt shapes and then sew those two pieces together with wrong sides of the fabric facing each other. Leave an opening along the straight edge through which to turn it right side out. And yes… clipping the curves before turning it right side out will help to make them lay nice and flat. Then once you have it turned right side out… sew the opening closed using a blind stitch. Press it well and you’ll have a beautiful new tree skirt to use next Christmas.
Have fun learning to sew!
Micheline Kosloff
January 3, 2012 2:02 pmI have a very large glass table. 64inch in dia.
my fabric is 54in wide……
table height is 27.5inches
I only have 3.6 yards of fabric left, so I was thinking of using an existing round table cloth, cutting it to fit to the edge of table, and only making a skirt to attach to the round cloth.
thank you
Micheline
Note: Edited to remove phone number
supermom
January 3, 2012 8:42 pmHello Micheline,
That should work… you’ll just need to remember to add a seam allowance to the measurement of the table top before cutting it the round tablecloth.
gudo hallstone
December 1, 2011 6:01 pmnice instructions, esp with the phoitos. I am looking for how muc cording around the hem I will need.
melanee
November 23, 2011 12:42 pmThank-you, Supermom! I really appreciate you taking the time to share your round-table expertise. Looks fantastic!
irmgard Burford
October 30, 2011 7:14 pmgreat instructions….what a life saver…..promised to make a round tablecloth for a friend…..will make it tomorrow
Salli Bordfeld
May 14, 2011 11:28 amThank you so much for your very clear and precise directions on making the round table cloth – the measurement part of it is where I was stuck! Thanks again, and have a great day!
Sincerely, Salli Bordfeld
supermom
May 14, 2011 1:21 pmYou’re welcome, Salli. I’m glad my instructions were able to help you. And thank you for taking the time to leave a comment to let me know.
Pete
May 2, 2009 9:21 pmAnother way to get a circle is with a pencil on a string. Fold as you did, tie a pencil on one end of a piece of string, measure the radius of the circle then anchor that much string at the point of the fold (what will become the center of the circle). You have to be careful to keep the pencil straight up all the way around the arc, but it is a pretty simple way to draw a circle. Pin and cut as you have instructed.
Comments are closed.