Cut a length of ribbon 50”. Find the center of the length of ribbon and place a pin there.
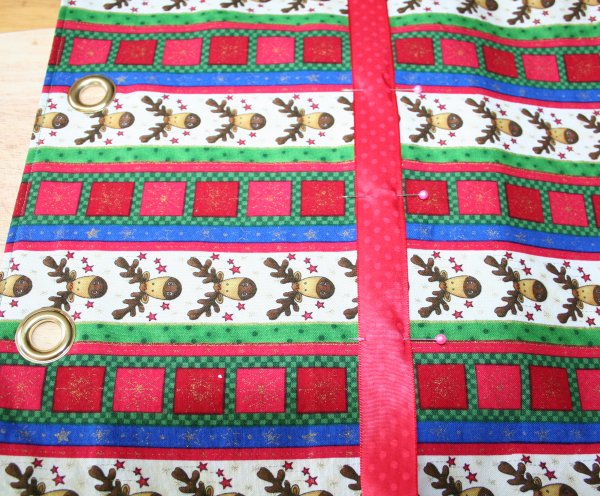
To determine where to place the ribbon, measure down 7 inches from the center of the top edge of the bag and pin the center of the ribbon at that point. Measure down 7 inched from center of each grommet and pin the ribbon at each of those points.
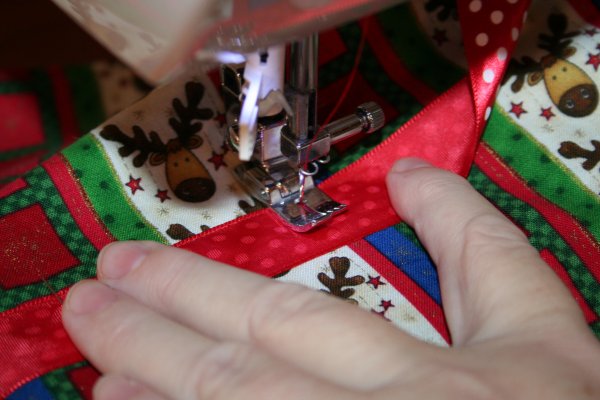
Sew the ribbon to the front of the bag, starting at the pin below one grommet and sew to the pin below the other grommet.
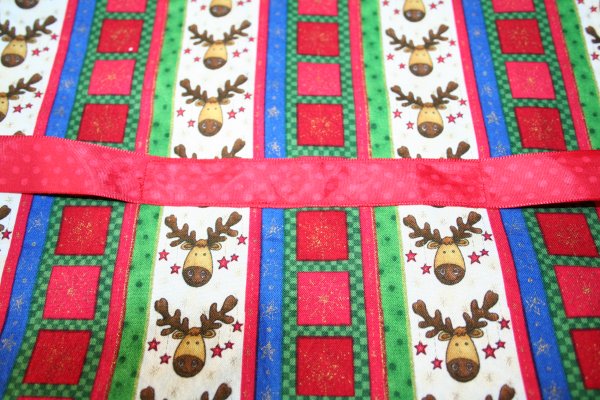
With the needle down, pivot, remove pin and sew across width of ribbon.
Needle down, pivot. Sew back across second length of ribbon. Needle down, pivot. Sew across final width of ribbon.
Note: Be careful not to catch ends of ribbon in the seam on the inside of bag (don’t ask me how I know)
To prevent the ribbon from fraying, trim ends either at an angle or a V.
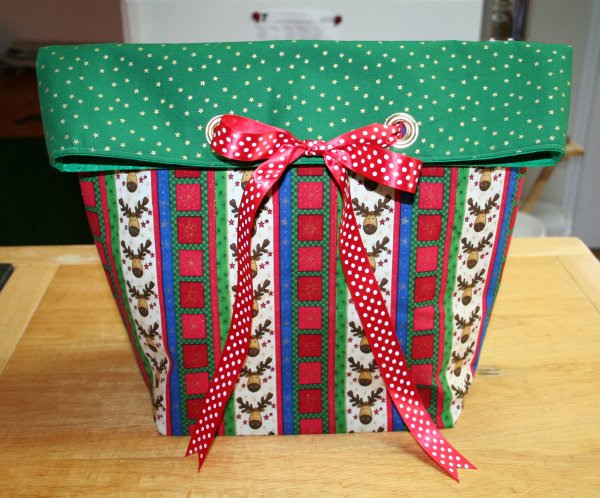
Fold the back over the front 3 ½”.
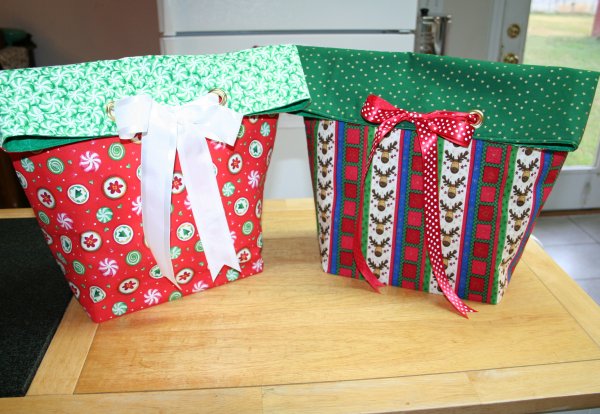
Thread the ribbon through the grommets and tie into a bow. Your gift bag is finished.
The other parts of this tutorial can be found by clicking on the links below.
Grommet Bow Gift Bag Tutorial – Part 1
Grommet Bow Gift Bag Tutorial – Part 2
Grommet Bow Gift Bag Tutorial – Part 3: Installing the Grommets





13 Comments
Jean Morton
November 19, 2020 12:47 pmThank you for this tutorial. I just discovered it. Usually I have no problem following directions, especially with all the great pictures. But I am a bit confused, even though I have read through the instructions many times. I assume that the grommets are installed on the front AND THE BACK of the bag. Otherwise the ribbon tie does not work at all. Or am I missing how the whole thing works? Always a possibility! Thank you again for the wonderful idea. Jean Morton
Super Mom No Cape
November 19, 2020 2:37 pmHello Jean,
You know in all the years that tutorial has been up this is the first time that I’ve been asked that question.
Yes, you add the grommets to the back of the bag in the same way as is described for the front.
Thanks so much for bringing this to my attention. I’m going to go in and edit the instructions right now so that they include to add the grommets to the back as well. 🙂
I tried to email me you as well, but the email bounced back, so hopefully you’ll come back and see my reply here.
sue
December 7, 2018 11:56 pmThank you! I need to find myself a grommet kit. Where is a good place to find one? I can see your hammer has been well used! 🙂
Super Mom No Cape
December 8, 2018 1:49 pmHello Sue,
I bought the grommets at one of our local fabric stores. You might try a drapery store as well. Another place you could try is a hardware store. If I remember right they were 3/4″ grommets.
Hope that helps. 🙂
Martha Raiford
September 9, 2011 6:24 amCute, cute, cute. Love gift bags and these are so adorable. Liked your tutorial. Always looking for gift ideas.
Marika Gabez
September 3, 2011 1:35 pmHello!
Your tutorial was really clear and easy to understand. I love fabric gift bags.
Hugs, Marika from Slovenia
R Hinkle
September 1, 2011 5:53 pmThis is Wonderful! I have been committing to more traditions/less wastefulness with my family, and this is a perfect Christmas project to convince the few naysayers. I will be making these and filling with cloth napkins and kitchen treats this year. Thank you!
Katherine
August 29, 2011 7:05 pmSweet tutorial, Sue! Love, love, love fabric gift bags. You’re so clever.
Sandra :)
August 27, 2011 8:37 pmOH that is a seriously cute gift bag – and I just happen to have a nice collection of grommets (and fabric, and ribbon … lol) – YAY!!!
See you soon – good luck tomorrow!! We have a family get-together – we’ll be very well fed, LOLOL!!
Maria
August 27, 2011 12:03 pmYour tutorial was really clear and easy to understand. Just love the gift bags, great gift idea.
The reindeer fabric is really cute.
Robin (rsIslandCrafts)
August 27, 2011 8:58 amThank you for a wonderful tutorial! The bags turned out cute. I was thinking they would make fun lunch bags too. They would make nice teacher gifts with a little snack inside.
Mary Grace McNamara
August 27, 2011 9:07 amDarling bags! Great tutorial! And I love bags!
MGM
corina
August 27, 2011 9:02 amExcellent tutorial! I love all the pictures. Thanks for taking the time to show us all how to make the lovely gift bags. The circle swirl fabric is so pretty. Do you have info on it? If you don’t have time to check don’t worry, just send me the bag and I’ll find it for myself, lol!
Comments are closed.