Recently, I crocheted some Prosperity Angels and a crocheted tree ornament where the pins I had used to block them with while the stiffener dried had rusted. Well, when I removed the pins, the rust was even worse than it appeared in the photos I posted.
I tried everything I could think of to get those rust marks out. The thing that worked the best was dishwasher liquid. But in the end, I was only able to salvage two of the Angels. The rest I was unable to get all the rust marks out of and as I’m a bit of a perfectionist and even the tiniest of marks was bothering me, I ended up throwing the others away.
Monetarily, it wasn’t a huge loss as white crochet cotton isn’t that expensive. But each of those Prosperity Angels takes me at least an hour and a half to crochet from start to finish.
Now one of the great things about the internet is that when you have a problem, you can often find a solution by doing a quick search and learn something new in the process. I found a website about blocking crocheted snowflakes in which she explains that she only uses stainless T-pins to block her snowflakes with. She also goes on to add that when she went looking for t-pins lately she’d only been able to find nickel-plated ones which have a tendency to rust.
(Edited to add: that website is no longer available so I have removed the link)
Sure enough, when I checked the box of pins I’d used, even though they were clearly marked rust-proof, on the bottom of the box in tiny print it says they are nickel plated. The pins I have used for years to block crocheted ornaments are packed away in storage. I had purchased those pins because the packaging said they were rust-proof and I wrongly assumed they would be the same quality as the ones I’d been using for years.
Her recommendation to use stainless steel t-pins sent me off on another search. I found what I was looking for at lacis.com. I ordered one package of: Stainless Steel “T” Pin, 1.2″ #20 (.036) Stainless Steel “T” Pin, 1-1/4″ long, box of 100 pins to try them out. At $8.00 per box, they aren’t cheap, but when you spend hours working on projects the last thing you want to worry about are the pins rusting when you go to block them. Shipping is free within the US but there is a $4.50 handling charge on all orders.
I’ve used the pins now on five different projects and am pleased to say I’ve had no rust marks on any of them. I’ll be ordering more pins from lacis in the near future.
Another helpful tip I took away from the above website about blocking snowflakes was to use the cardboard cores from fabric bolts as blocking boards. Now I’ve always used a Styrofoam sheet, but those can be quite expensive and the cardboard cores are often free for the asking.
So the last time I was at Joann’s I asked if they had any extras. The lady behind the cutting table said I could have as many as I wanted. I came home with four but if I was making Angels or other ornaments to sell like I did in the late eighties/early nineties, I would have taken several more.
Today, I thought I’d share how I go about stiffening and blocking my crochet thread ornaments.
Before stiffening and blocking, I wash my crocheted piece in warm water with a few drops of Ivory Dish liquid (the kind for washing dishes by hand.) This removes the oils that come from your hands when making the item and also any other “dirt” the crochet thread may have accumulated over time. Then I rinse it thoroughly in cold water, squeeze out the excess water and lay it flat to dry.
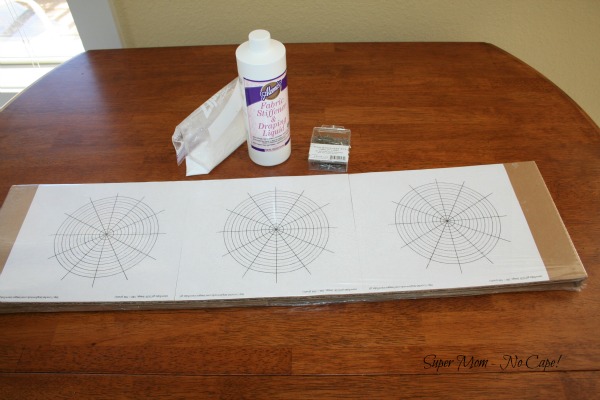
When I’m blocking my Angels I use a blocking template I’ve created (and which I provide with the pattern.) I print out however many templates I need, tape them to the blocking board that I then cover with plastic wrap.
For the snowflakes I’m showing you today, I used this blocking template. The spokes and evenly spaced circles radiating out from the center make it very easy to evenly block and pin them.
I think everyone who crochets ornaments probably has a favourite starch/stiffener. I have two that I’ve used successfully in the past. One is called Stiffy and the other is Aleene’s Fabric Stiffener and Draping Liquid. (<-affiliate link) When using the Aleene’s, I add some water to thin it out a bit.
First, I pour a small amount of the stiffener into a plastic zip bag, place the snowflake inside, seal the bag and then massage the bag until the snowflake is saturated with stiffener. Then I open the bag, remove the snowflake and squeeze the ornament over the open bag so that the excess stiffener drips back into the bag and can be used again.
I start by pinning the middle of the snowflake to the middle of the template. Then I work my way out from the center, blocking and pinning as I go.
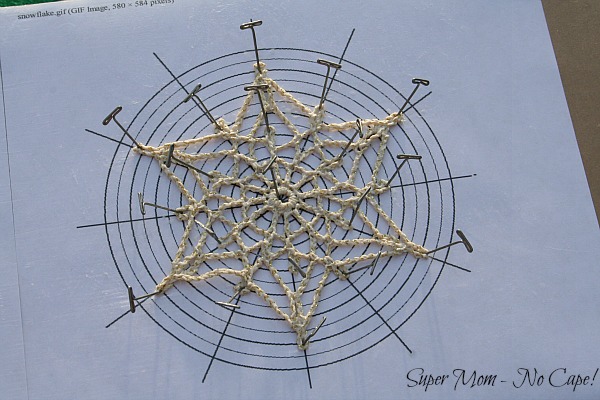
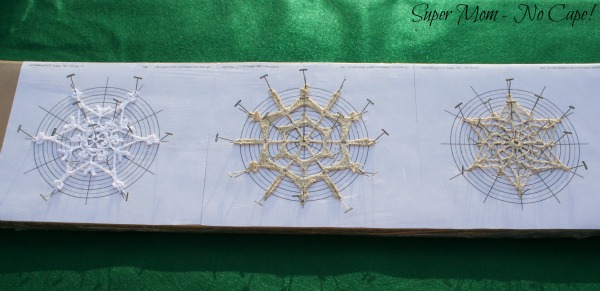
Then I allow the snowflakes to dry completely.
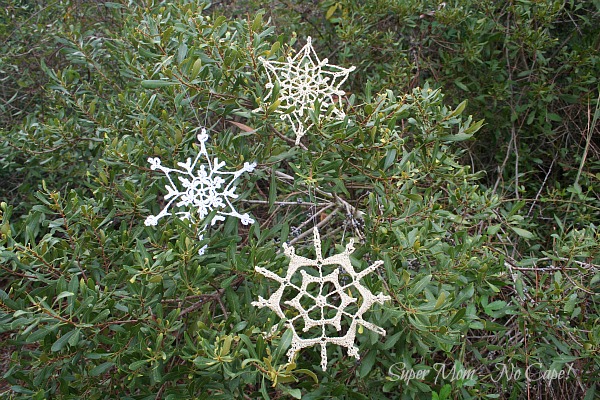
And here they are dried and arranged “artfully” in a small bush behind our apartment.
I’ll put these away now, ready to add to the top of gifts next Christmas or to slip into Christmas cards (assuming I get around to doing Christmas cards this year.)
This post contains affiliate links. For more information please check my Disclosures and Disclaimers page. It doesn’t cost you any extra, but it does help support this site.


6 Comments
Stacy K
January 23, 2021 8:40 amThank you! I have been looking for a template to use while blocking so appreciate you sharing the template and the links to the fabric stiffener (which is now in my Amazon cart!). Love the tips and can’t wait to get going on making more snowflakes.
Theresa
August 2, 2015 1:50 pmPretty snowflakes. I have a leaflet that I’ve had for years with several snowflakes patterns in it. I’ve held on to it cause I’ve always wanted to give them a try. I crochet so tightly that working with thread is painful. Now that I’m getting older my tension is loosening a little. May be time to try working with crochet thread again. Thanks for sharing.
Nancy D
February 7, 2013 2:09 amLovely snowflakes! We are getting tons of real ones over the next 48 hours. Perfect weather for my pretty blue scarf! It was such a nice surprise — and the Russian Doll FQ was amazing too! Thank you so much!
Jan
February 6, 2013 2:30 pmIt’s really a shame you had to throw away some snowflakes after spending so much time creating them. They are beautiful!
I don’t know how large the rust spots were on the snowflakes you threw away. If the rust spot wasn’t too large, maybe you could have covered the spot with a Swarovski crystal (the kind you attach with the HotFix Tool) on each point on both sides. That would have added a little extra sparkle and nobody would have known there were rust spots. Or maybe use a bead of some sort to cover the spot.
Years and years ago, my best friend’s mother made crocheted snowflakes. After she pinned them to her board, while still wet she sprinkled a little bit of extra fine clear glitter on them. The glitter really added a little extra umph to the snowflakes.
kathy h
February 6, 2013 12:25 pmI so enjoyed reading your post today. Good tips about those pins. They would be useful even for some of my regular sewing that I leave the pins in for a while. I have used those cardboard bolts for mini ironing boards but it is a great idea to use them for blocking. i will have to start collecting a few to have on hand. Thanks for all the info.
wendy
February 6, 2013 10:27 amI must remember to get some stiffener as the Mod Podge I used wasn’t ideal… I haven’t add any problems with my pins rusting, they must be nickel free. It’s a bit late now, but could you have dyed the angels with rust marks?
Comments are closed.