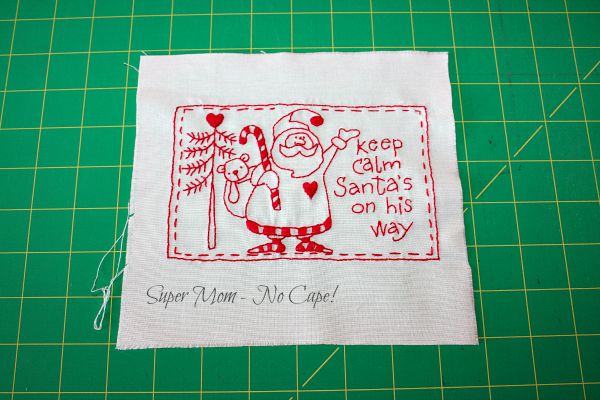
This small embroidery has been rolled over on my 2015 Finish Along list each quarter since the beginning of the year.
Back in September, I decided to use it as the top of an advent calendar. I didn’t know how much more embroidery or the amount of time I was letting myself in for.
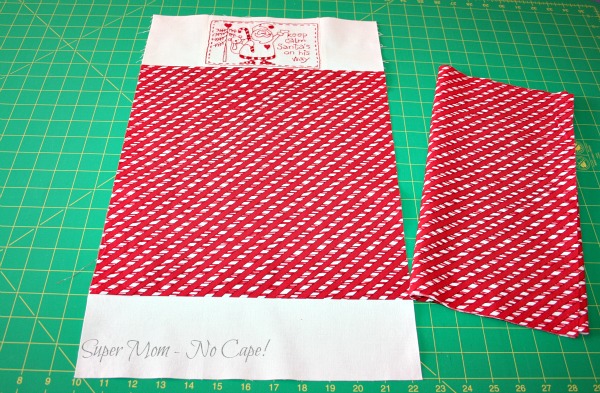
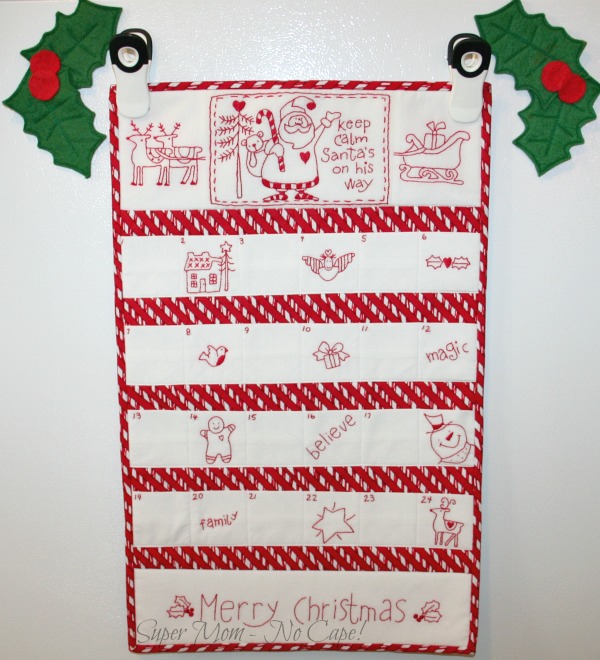
First, I added white squares of Kona Snow to either side to make it 12 1/2″ wide as I thought that would be a good width for the calendar.
Then I added a piece of candy cane fabric 12 1/2″ X 13 1/2″ as a base for the pockets and another strip of Kona Snow to the bottom.
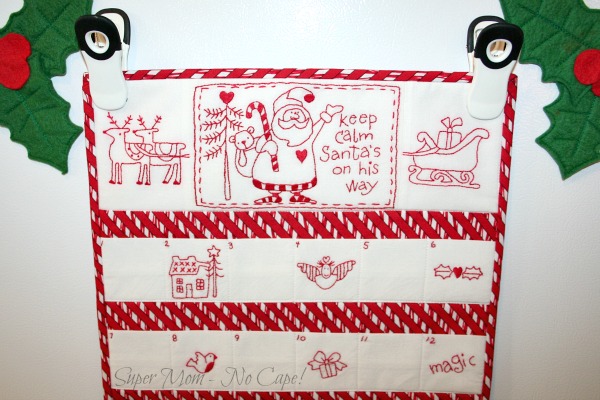
The “Keep calm Santa’s on his way” embroidery was part of a set of 4 free embroideries offered by Red Brolly in 2012. (edited to note: Red Brolly has temporarily closed their site but say they hope to be back up and running sometime this year.)
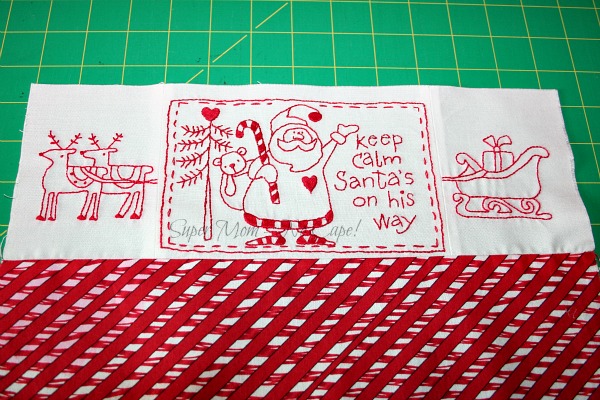
To keep with the Red Brolly style, I used Santa’s sleigh from their “He’s Coming to Town” Sampler, placing the reindeer on one side and the sleigh on the other.
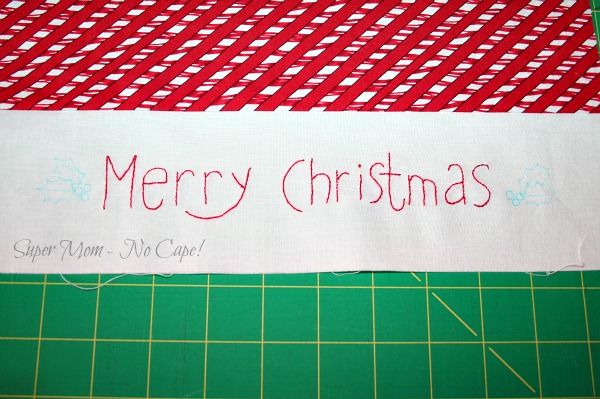
For the words Merry Christmas on the bottom, I attempted to copy the style of lettering used in “Santa’s on his way.”
Next came the challenge of how to make the pockets.
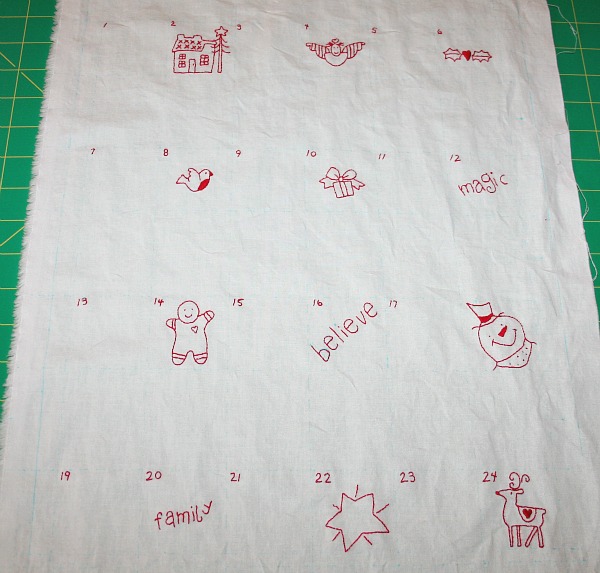
In the end I decided to make them in 4 rows of 6 days. On a large piece of Kona Snow, I lightly drew a grid with each pocket row being 12 1/2″ wide X 4 1/2″ tall. Then I centered the embroideries in those rows so that I would have pockets that were 2″ square.
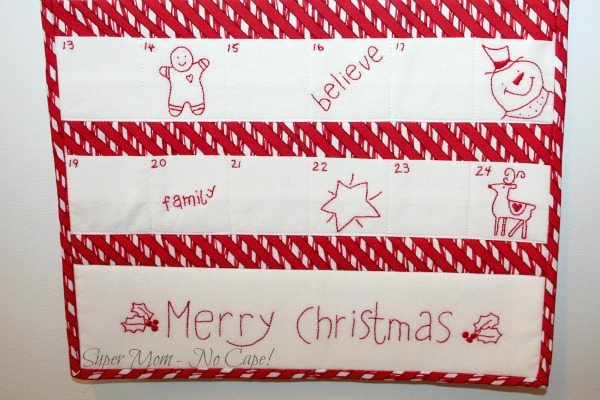
Here again, I used motifs from various Red Brolly Christmas samplers… The Night Before Christmas Sampler, Believe Sampler and Christmas Sampler.
After I finished stitching them, I cut along the lines I’d drawn. A strip of fusible interfacing was ironed to the wrong side in the center of each strip. Then these were sewn wrong sides together to form a tube, turned right side out and pressed so that the seam was centered down the middle of what would be the inside of the pocket.
I fused a 12 1/2″ X 20 1/2″ piece of batting (<-affiliate link) onto the wrong side of the Advent Calendar, pinned and sewed the pockets in place.
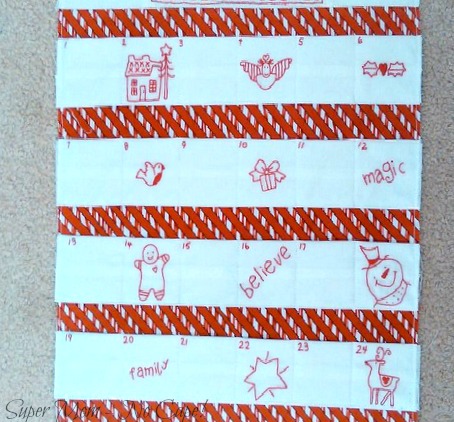
If I’d been brave enough, I would have topstitched those pockets in red thread. Should I make another one sometime, that’s what I’ll do.
The backing fabric was then pinned on and I stitched-in-the-ditch between the top and bottom panels and the center panel and then along the bottom of each row of pockets.
I finished hand sewing down the binding last night and it’s now ready to hang up on the first of December.
A close-up of the top half:
The bottom half:
The Advent Calendar was my goal for October for A Lovely Year of Finishes. It’s obviously a little late for that but it’s done now and can be checked off my 2015 Finish Along Q4 Goals list.




23 Comments
Renee
November 20, 2017 10:44 pmThis is so cute!
Super Mom No Cape
November 22, 2017 1:56 pmThank you Renee!
Sheryl
November 15, 2016 4:52 amWhat a gorgeous Advent Calendar and the candy cane fabric is just perfect.
CathieJ
November 14, 2016 9:16 pmThat is a wonderful Advent Calendar. I love seeing all different renditions.
Jenny Benton
August 23, 2016 12:15 amVery nice indeed – I love Christmassy things!
Janine
November 30, 2015 6:39 pmThis is so cute 🙂
wilma serrao
November 29, 2015 7:08 pmhi super mom
I like your blog a lot. But can never figure how to use the embroidery work basket patterns at all. But after seeing this advent calendar patterns I was amazed at how you think of a project and how you come up with ideas. I liked the free patterns and was trying to download the projects from Red Brolly but cannot figure out. can you pls tell me how to follow a blog like Red Brolly which is asking for a password. I had never seen anything like this before. If i see a pattern my brain fogs up and I cannot decide what colors even. I have been sick for awhile now and cannot quilt so redwork seems to be my companion for a short time when clarity is not a issue. when i see your projects specially giving old furniture a new life with love and making it your own with a husband who makes magic with it is so darling. Keep going with this blog all your ideas bring joy to my heart and make my life worthwhile.
take care
thanks for the love you shower on your readers
wilma
Heidi
November 27, 2015 2:04 pmI have always had a thing for advent calendar’s, This is Darling! Especially the ‘Keep Calm’!
Joanne
November 24, 2015 4:24 pmWhat a wonderful advent calendar, you have put so much work into stitching that!
Thanks for linking up!
Flashinscissors
November 15, 2015 4:22 pmLovely embroidery Sue. What a gorgeous calendar! Wonderful finish!
Barbara xx
QuiltShopGal
November 13, 2015 12:59 pmAbsolutely gorgeous. Total #CreativeGoodness. Such beautiful stitching.
QuiltShopGal
http://www.quiltshopgal.com
Mary Anne
November 11, 2015 8:02 pmMy daughter-in-love just this weekend requested that ‘grandma’ make an advent calendar for our grandson for use next year. I have a year to decide on which one I will make. Little did she know that I’ve already been collecting ideas!!
Danice
November 9, 2015 4:21 amBeautiful calendar. I found you on Quilt Shop Gal’s link party 🙂
Renee
November 9, 2015 1:50 amAbsolutely adorable! What a lovely job. What a wonderful addition to your holiday decor! Love it!
Christine B.
November 8, 2015 6:22 amWhat a beautiful finish Sue! If you wanted to enhance the pockets more you could always just top stitch a running stitch between them by hand…. just through the top layer. Christine x
GeminiJen NZ
November 8, 2015 4:45 amYou are super clever! That is a creative way to use your stitching – very nicely done!
Debbie
November 7, 2015 2:13 pmLove your hand embroidery! It turned out so charming! Great finish….and it’s not even thanksgiving..your WAY ahead 🙂
Jane
November 7, 2015 11:20 amIt looks great, nice finish and congrats on another WIP biting the dust!
Rachel
November 7, 2015 5:48 amWell done!. Life got so far ahead of me I’ve not set a stitch for weeks, and it’s lovely to see someone else getting something done!
Christine
November 7, 2015 5:33 amCongratulations on your finish! I love your redworks, so fresh and festive!
Jackie
November 6, 2015 8:32 pmWow! That is gorgeous!
tubakk
November 6, 2015 6:17 pmSanta’s on his way, and he’s coming all the way from Norway. Nice advent calendar you’ve made. Greetings from Turid in Norway
Cindy S.
November 6, 2015 5:52 pmSo cute! I can’t imagine how much time went into this! I purchased advent calendars from a craft show for my kids 30+ years ago, and have now passed them on for them to use with their children. I wish i would have made them myself, knowing now how much they loved having them. They are nowhere near as nice as the one you made. I am sure your family will treasure this for many years to come!
Comments are closed.