With all the secret Christmas sewing that is happening here, I only managed to finish one small project that I’m able share before gift opening day.
But there is a really big finish that I’m just so happy about that I can’t stop smiling every time I look at it.
I’ll start with the small finish.
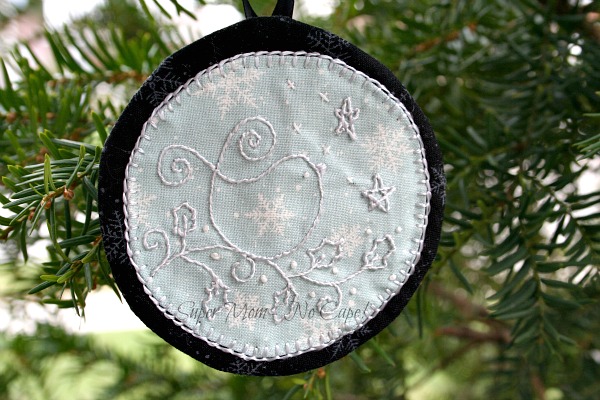
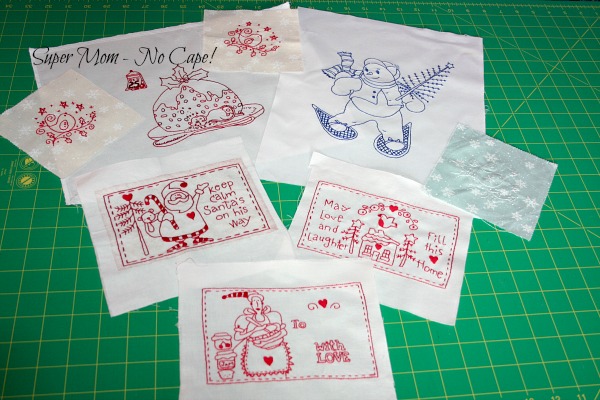
I’ve had a little bird embroidery that was another of those that has rolled over on my 2015 Finish Along list since the beginning of the year. I didn’t know what to do with it because I wasn’t completely happy with how it had turned out. Here it is pictured along with the two redwork birds that I had stitched from the same pattern.
As you can see, I had stitched it in white on the blue color way of the fabric that I’d used for the redwork birds. However, the white stitching didn’t show up the way I had hoped it would. What to do to fix it became the question.
The answer was so simple, I’m almost embarrassed that I didn’t think to try it sooner. I took two strands of DMC S415 and stitched over and under each of the white backstitches; kind of like whipstitching around each stitch.
I’m not sure if this technique has a name but it created a lovely raised effect that I know I’ll be using again. The DMC Satin Floss has a beautiful sheen to it that catches the light and makes the little bird and stars shine.
Edited to note: I just discovered that the technique does have a name and wonder of wonders it is called the Whipped Backstitch!
This sweet pattern was designed by Gail Pan for the 2012 Aurifil Holiday Blog Hop.
You can see the two finished redwork ornaments on my post for the Tree Bird Blog Hop.
Now that it’s done I can check it off my 2015 Finish Along Q4 Goal list.
Now for the big finish.
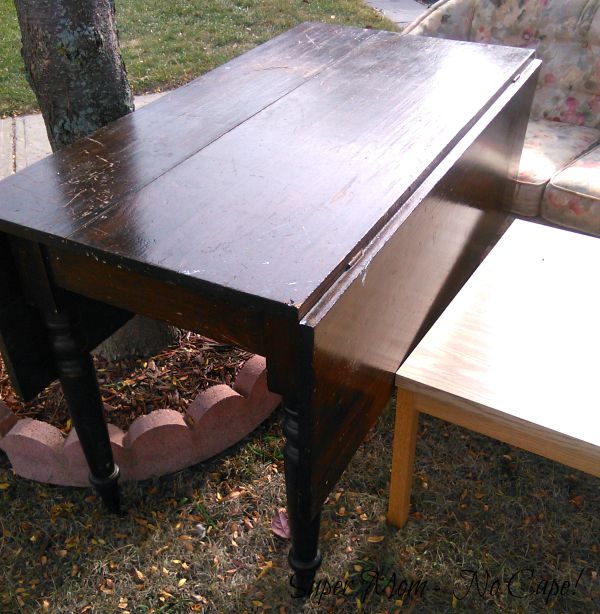
Back at the end of September, I found a solid wood drop leaf table on the curb waiting for garbage pick-up.
People will often put large items out thinking that someone will come along and take it but if no one does before the garbage collectors come along, they are heaved in with all the other garbage and taken to the dump.
When I first saw it, I didn’t know what I would do with another table, but I simply couldn’t let that be it’s fate.
I hurried home and brought Dave back to help me carry it. We must have been quite the sight walking down the sidewalk carrying that table.
Once we got home and had a good look at it, the perfect use for it became clear… a replacement for the plastic folding table that I was using as a cutting table.
Ever since, I have been anxiously waiting for my new cutting table to be finished. Each day I would open the garage door just to look at it… sometimes several times in just one day!
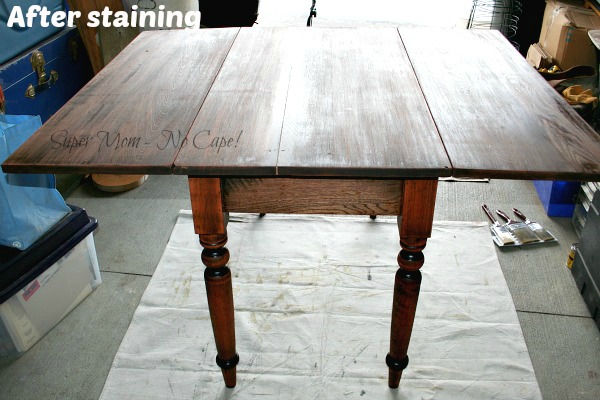
It was such fun watching it progress from being sanded to Dave repairing the split in the top to more sanding through the various grits of paper.
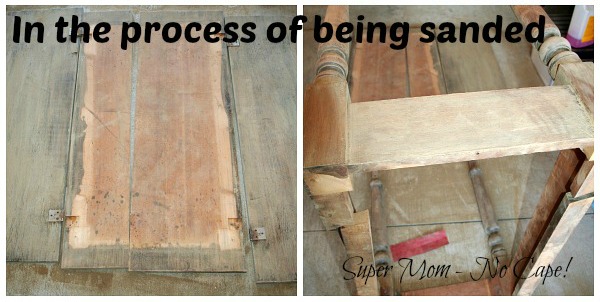 Then came the picking out of just the right stain. The table is made from a different wood than the Art Deco cabinet that houses my vintage Singer 15-91. Different too than the vintage Kenmore cabinet that he modified and refinished to hold my modern Singer.
He knew he wouldn’t be able to match the stains on either exactly but he hoped to come close to the stain on the Art Deco Cabinet. He also had to take into account that the table had previously been stained a dark walnut color that had seeped deep into the wood and not all of it could be sanded off.
Several coats of poly later and it was finally ready for me to use.
I’ll warn you now… get ready for drop leaf table overload. I’m just so over-the-top happy with how it turned out, I took lots and lots of pictures.
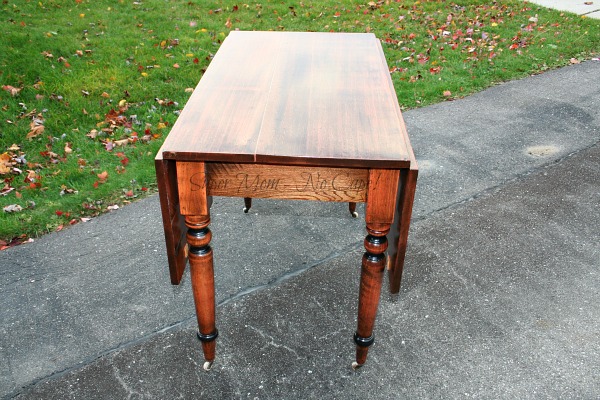
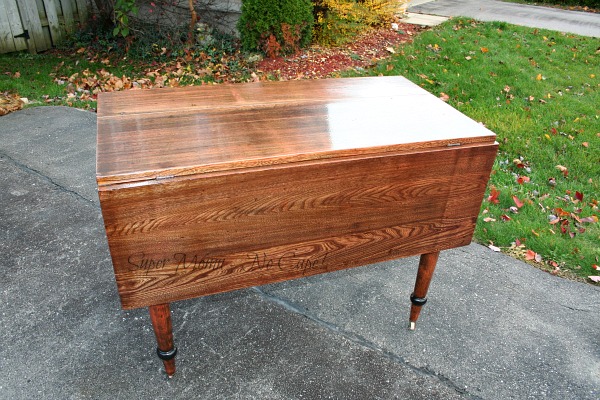
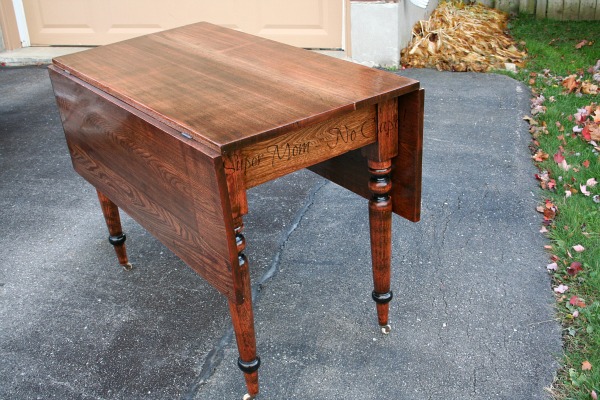
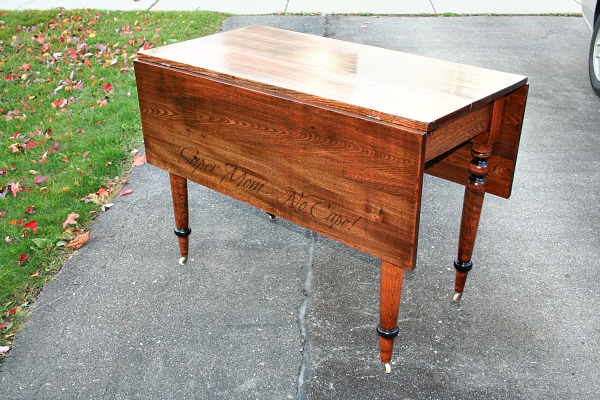
First, we moved it outside to get some shots of it before taking it upstairs.
And end shot:
Side photo:
Photo of the other end:
The opposite side:
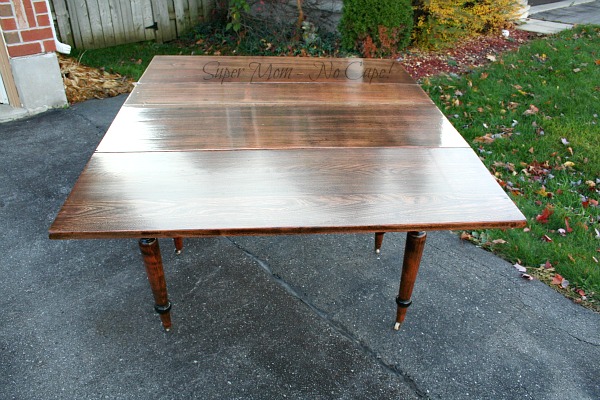
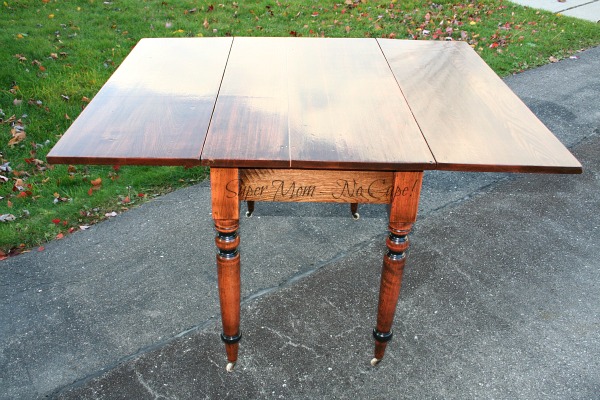
And two photos of the table with both leaves up:
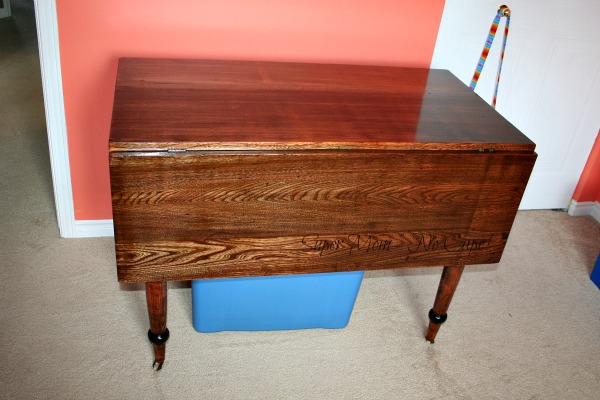
Now up to my sewing room…
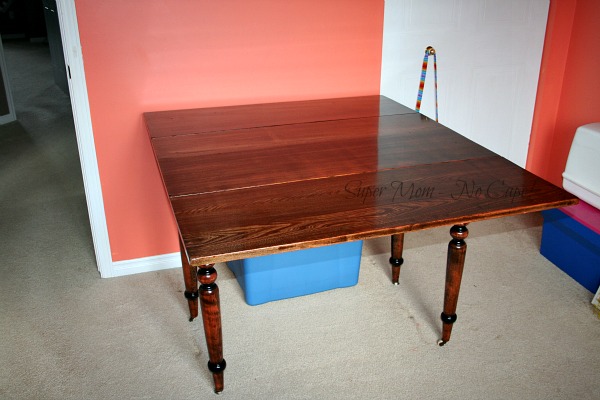
It takes up quite a bit of room when both leaves are up.
That will be great when I’m cutting out clothing patterns.
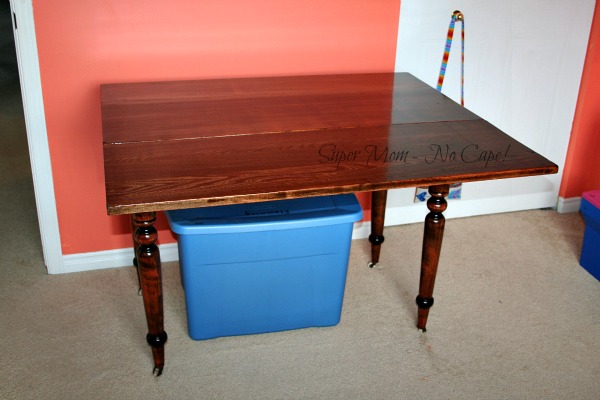
But most of the time, I’ll be using it with only the one leaf up:
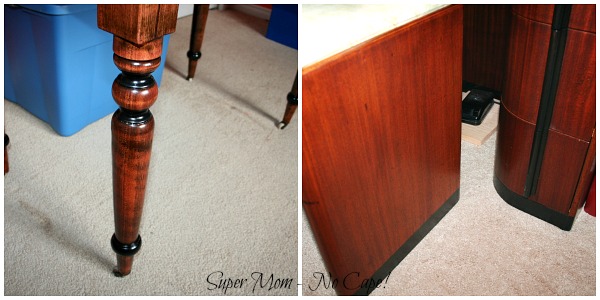
I also wanted to show you a couple of the details Dave added.
The table top had split over the years as it dried out. But he couldn’t just rejoin the two pieces and have them fit back on the base properly, so he added two thin strips of wood veneer to each piece before gluing the top back together.
The table top is completely smooth and there’s nowhere for anything to get snagged or for pins to disappear through.
When he stained the table legs, he added ebony accents to match my Art Deco sewing cabinet.
It’s those added touches along with the many hours Dave took to get the color and finish just right that took this from a simple refinish job to something that I’ll treasure for years to come.
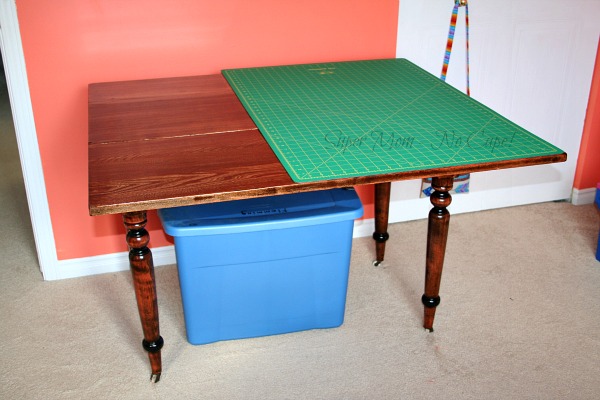
Just one more photo to show you just how perfect it will be as a cutting table.
There’s room enough for my 24″X36″ cutting mat and extra space to organize whatever project I happen to be working on.
It has even changed the feel of my sewing room. I’m thinking that Dave added a lot of his love to it in addition to the time and care he took refinishing it.
My new cutting table (along with the sewing cabinets he refinished for me) has already become one of the very few things that will always move with us, no matter where our travels take us.





25 Comments
Renee
December 13, 2016 10:32 amWhat a gorgeous ornament! (The table is lovely, too!)
Jenny Benton
December 12, 2016 4:45 pmWhat a great job you have done on the previously unwanted table – it looks great!!
Joanne
November 24, 2015 4:27 pmThat ornament is brilliant and your restoration of that table is fabulous!
Thanks for linking up!
Christine M
November 16, 2015 5:58 amLovely stitching Sue. I only learnt that whipped stitch a few weeks ago but I did it on running stitch.
Tiffstitch
November 15, 2015 11:51 pmThat is awesome!!! Beautiful work for both you and Dave, and what a great addition for you!
Stephanie
November 14, 2015 7:13 pmDon,t you just love it when the spouse supports your passion/hobby with beautiful handwork.
I’m getting warm fuzzies and thinking of my own handyman when he has done the same for me.
Kudos to Dave; beautiful work. And if/when your family gets bigger, there’ s another dining table!!!
Rachel Wright
November 14, 2015 12:10 pmIt’s a great success, and will I am sure have a second life even longer than the first!
Lorna McMahon
November 14, 2015 10:12 amYour embroidery is certainly coming along nicely…. But that table!!!! Oh, my! What a wonderful job your husband did of restoring it. What a treasure! Both are a keeper!
Teresa in Music City
November 14, 2015 10:02 amSuch a priceless gift of love!!! Good eye to recognize the treasure in the trash! I especially love the mahogany touches on the legs – so perfect! My husband has finished a few pieces of furniture that traveled down in my family to me – nothing even close to valuable, but when he got done with them they were beautiful again. I treasure them more than anything else I own – not only because they came from my mom, but because his love is sanded in and painted on with every stroke!
Carol
November 14, 2015 8:28 amWe have a table just like that that we got the same way and finished in the same color stain!! I also got an oak one on the roadside that was missing a drop. My husband routed a match to the drop that was there and we refinished it..no stain just varnish. You just have to have an eye for the finished item then grab it up!!
Your table is absolutely beautiful.
xx, Carol
Celtic Thistle Stitches
November 14, 2015 3:37 amTwo great finishes Sue, and great saves too. Dave’s refurb of your found table is spectacular.
Sandra
November 13, 2015 10:04 pmWhat a great recycling project! Your hubby created a new table out of an old one. Happy for you that you finished with your hand embroidery. Great job to both you and your hubby. 🙂
Sandra
Snowcatcher
November 13, 2015 10:02 pmNot overload at all! I can see why you are so proud of this. What a makeover! What a treasure! I really love that your husband’s handywork will be there in the sewing room with you every time you work!
Your embroidery fix is brilliant!
Marilyn
November 13, 2015 9:55 pmLOVE, LOVE, LOVE your table. Your hubby has done an awesome job and obviously with lots of love in it. Your white bird has come up a treat with the whipped stitching.
Susan
November 13, 2015 9:52 pmFirst, the bird is wonderful. That was a genius decision to use the DMC satin and stitch it that way. Second, I LOVE your table. I could see its potential from the day you dragged it home, but Dave really outdid himself on this project. It’s the most beautiful piece of furniture now. Did you show a picture to the folks who threw it away? Nah, they would want it back now! LOL Just a beautiful, beautiful job, and I think you are right about the love.
Karen
November 13, 2015 10:20 pmWishing you many years of enjoyment and use of your cutting table.
Pauline
November 13, 2015 8:49 pmWOW…what a beautiful table. It would have been sad had it ended in the dump!! What a great rescue!!
Mary Anne
November 13, 2015 7:05 pmYour wee birdie looks perfect, but I have to admit that I’m totally blown away (and in love with) your new table!! I simply can’t imagine all the hours that your DH put into it – obviously a labour of love.
Heather
November 13, 2015 7:45 pmWow that looks stunning, now to do lots of beautiful sewing 🙂
Joyce1493
November 13, 2015 7:01 pmThe table is simply beautiful!!
Nicole Sender
November 13, 2015 6:23 pmWow, weren’t you lucky to find this table? It looks great!
Doris McCarty
November 13, 2015 5:23 pmI’m excited for you!
Flashinscissors
November 13, 2015 3:56 pmYour little bird looks great with the whipped stitch finish – amazing how a little change can make such a difference! Wow, what a fantastic job Dave made on the table for you, and finishing it to match your cabinets! What a lovely Hubbie you have! Barbara xx
Raewyn
November 13, 2015 3:16 pmYour little bird with its whipped stitch is such a cute finish – but the table is an amazing transformation, it’s beautiful, well done to Dave! I bet you will smile every time you use it!
Tracy
November 13, 2015 3:13 pmWhat a lovely recovery the table has made. Yay for recycling!
Comments are closed.