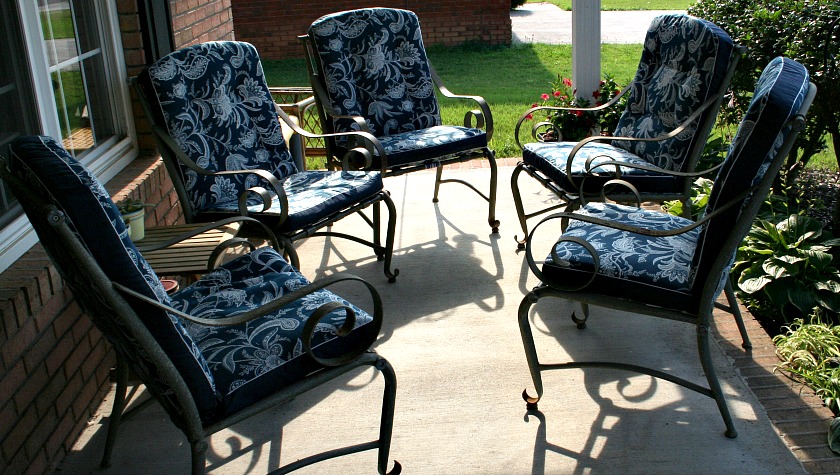
Learn how to recover lawn chair cushions to give them new life at a fraction of the cost of buying new ones.
The step-by-step instructions provided in this tutorial will show you how I went about recovering mine with new fabric while reusing the inside foam and batting and recovering the buttons.
Also included is an easy faux-piping technique will save you time and money not to mention fabric.
When I decided to recovered all 5 of our lawn chair cushions, I knew it was going to be huge undertaking but let me assure you, the finished result was so worth it!
While it’s unlikely that you have the exact same set as I do, you can adapt this same process to recover yours.
How to Choose the Right Fabric
I’ll start with the fabric I used.
In the spring of 2011, Hancock Fabrics had a mega fabric clearance sale. You can see some of the fabric I managed to pick up in the second of my How Not to Destash posts.
In addition to bolts and bolts of 100% cotton priced at $1 per yard, they also had several rolls of their upholstery fabric priced at $2 per yard. I knew I would need at least 10 yards to recover our lawn chairs. Unfortunately, when I found a roll of fabric that I liked… there weren’t quite seven yards of it. Not to mention, those seven yards weren’t continuous yardage but in two separate pieces on the roll.
But I really, really liked that fabric.
So I searched through the rest of the upholstery fabric and found a large striped fabric that matched the blue and white of the main fabric priced at $4 per yard. There was a little over 3 ½ yards of it.
I figured if I used the striped fabric for the sides of the cushions, I might have just enough of the main floral fabric for rest of the cushions. (I did end up having to piece some fabric to make the fifth cushion but as it’s on the back and bottom of the cushion, it’s not noticeable.)
To make the pattern:
On several of our cushions, the fabric was very badly worn so when it came time to making a pattern for the new covers, I chose one of the cushions where the fabric was in good enough condition to provide pieces to trace around.
Then I carefully unpicked the seams that held the back and seat of the cushions together; taking note that the originals had been sewn together using an enclosed or French seam.
In other words, the back and seat had originally been sewn together with the front of the back cushion facing the top of the seat cushion and then turned and sewn with the back of the back cushion facing the bottom of the seat cushion; thus enclosing the seam allowance and making a strong, cleanly finished seam that wouldn’t fray over time.
With those two seams unpicked, I had two separate cushions; a back cushion and a seat cushion.
Then once I had those two cushions completely taken apart, I ended up with 6 pieces from which to make my paper pattern; the front, back and side of the cushion back and the top, bottom and side of the cushion seat.
I gave all the fabric pieces a quick pressing to make the seam allowances lay flat.
After comparing the fabric pieces, I could see that the front and back of the back cushion were shaped exactly the same except the front was ¾” longer. The same held true for the seat cushion, with the top being ¾” longer than the bottom.
So for the paper pattern, I folded a large piece of packing paper (<-affiliate link) in half. Then I folded the shorter of the fabric pieces of each cushion in half along the length, placed the fold of the fabric against the fold of the paper and traced around the fabric. I then took that paper pattern and add ¾” to make the front/top cushion paper patterns.
Cutting the fabric:
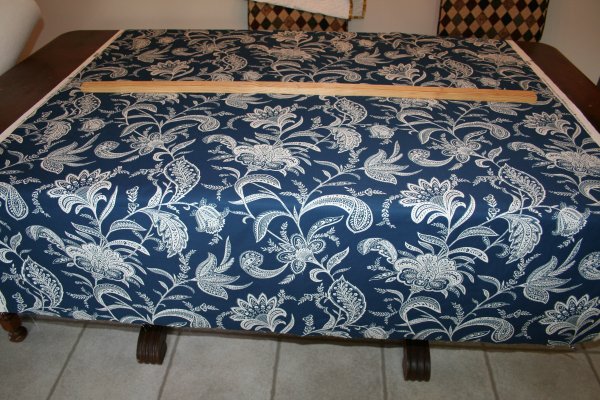
When it came time to start cutting fabric for the front of the back cushion and the top of the seat cushion, I noticed that the fabric had a repeating floral design. On the finished cushion, I wanted the designs on the front of the back cushion to line up with those on the seat cushion once those two cushions were finally sewn together. And I wanted each of the five cushions to look the same once they were complete.
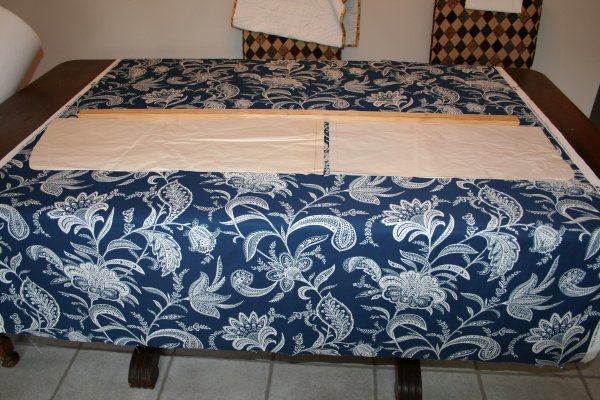
I chose which part of the floral design I wanted centered on the cushions and then laid a long straight piece of wood (from Dave’s stash in the garage) on the fabric being careful to have that straight edge line up along the center of the two flowers, I wanted to match.
Then I folded the paper pattern pieces in half and lined them up along the piece of wood.
I secured the pattern in place with a couple of pins, removed the wooden stick, flipped the pattern pieces open and pinned both pattern pieces in place.
It was then just a simple matter of cutting around the pattern. I followed the same procedure to cut out five sets of the front and top cushion pattern pieces.
Since the back of the back cushion and bottom of the seat cushion wouldn’t be seen together once they were in the chairs, it didn’t matter if the design on the fabric lined up exactly, so I just pinned those in place making best use of the fabric and then cut them out.
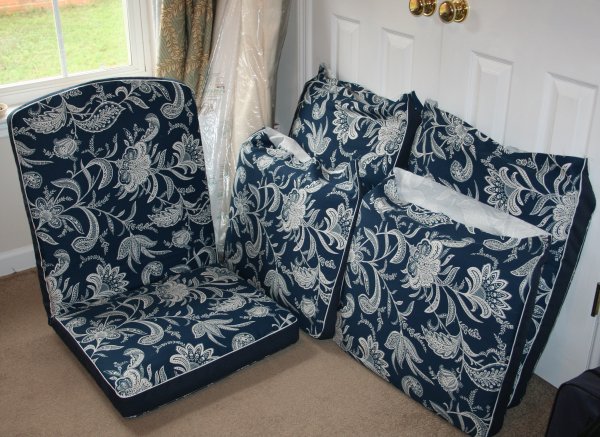
As I cut out the fabric, I made a separate pile of cut out pattern pieces for each cushion and then throughout the sewing process, I maintained those piles so that when it came time to finally sew the back cushion to the bottom cushion there would be no guessing which of those carefully cut out pieces went together.
The photo above shows one completed cushion and two that were waiting to be sewn together.
In my next post on recovering lawns chair cushions, I’ll show how I used the striped fabric to create that faux piping effect on the cushions.
Updated to add:
Part 3 – Sewing the Back and Seat Together
Part 4 – Making Matching Buttons
This post contains affiliate links. For more information please check my Disclosures and Disclaimers page. It doesn’t cost you any extra, but it does help support this site.




4 Comments
cteachr
May 26, 2013 9:56 amWow!
supermom
March 11, 2012 7:47 pmHello Amy,
The main floral fabric is outdoor fabric and the striped fabric is canvas.
amy
March 10, 2012 10:50 amGorgeous covers! Did you just use regular home dec fabric or the kind specially made for outdoors?
Comments are closed.