I didn’t get the table runners done, but I did manage to get the little clutch purse finished.
Earlier in the week, when I was cutting out the pattern pieces for the purse so that they’d be ready for Friday night, I decided I should take some scrap fabric and make a test of the pattern. Good thing I did because there were a couple of easily fixed errors but ones that you wouldn’t want to happen if you were cutting into your good fabric.
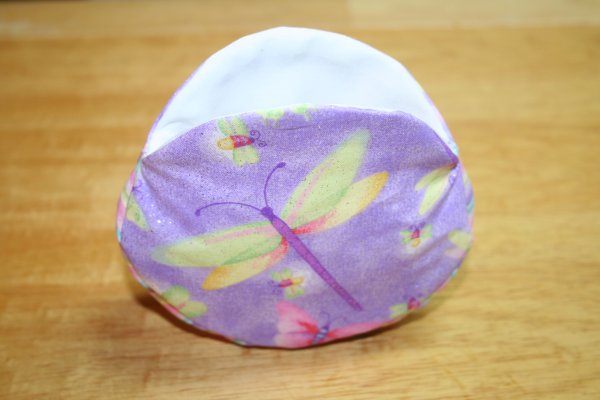
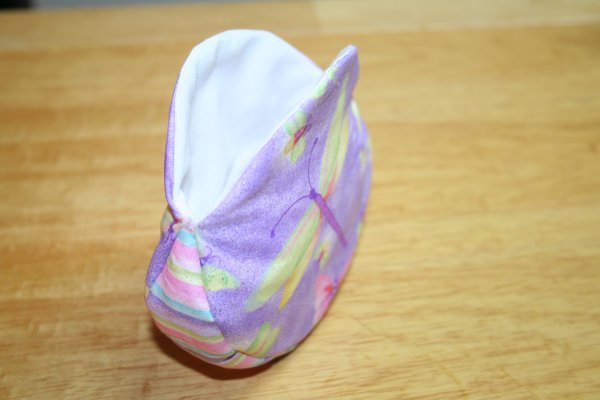
Once I’d finished the tester, I figured why waste it as it would work for a lining and so I found some more scraps leftover from making a gift bag and made the outside of the purse. I was quite pleased with how the fabric part of the purse turned out.
I fussy cut the fabric so that the dragonfly would be in the center.
I can picture all sorts of these little clutch purses with fussy cut fronts and different combinations of fabric for the front and sides.
I only had one of the clutch purse frames and I wanted to save that as I had purchased it to go with the blue ladybug fabric. But having almost completed one purse, I figured putting the one together last night would be a breeze. I mean, all I had to do was make another fabric purse and sew it to the frame. What could be so hard about that, right?
And the fabric part of the purse did go together fairly easily. The taffeta that I used for the lining is less forgiving than cotton in that it’s slipperier and as you remove the pins when sewing, it can shift a bit.
Some unpicking action had to take place to remove a pucker in the bottom curve of the lining but other than that it was pretty smooth sewing.
Then it was time to sew the purse to the frame. Yeah… that’s where things got tricky.
The curse curve of the purse (yes there were words spoken) doesn’t match the curve of the frame. The top part of the purse does fit in the frame but getting it to stay there while at the same time trying to sew it in… that’s the tricky part. And it took me a few tries to figure that part out. Did I mention that there were words spoken?
Here’s my solution:
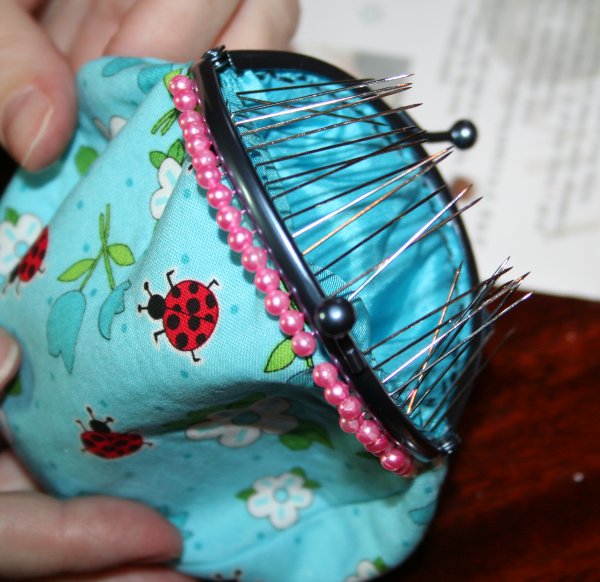
I counted the number of holes in the purse frame. There were 28. So I positioned the center of the purse between the 14th and 15th holes and placed a pin in each. Then I went to each side and pinned those in place. Next I worked my way towards the center; pushing the purse into the frame and pinning.
Beginning at one side, I sewed in one hole, out the next all the way across (a running stitch), removing pins as I went. Once I reached the other side, I worked my way back across to fill in the stitches.
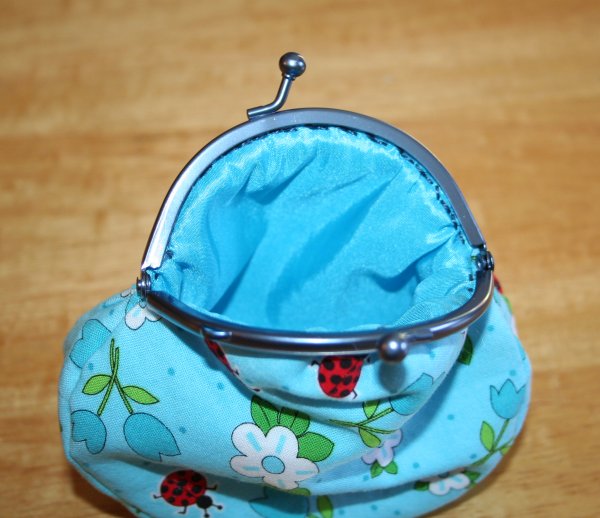
Then I repeated those steps for the other half of the purse and frame. Finished, the little purse looks like this:
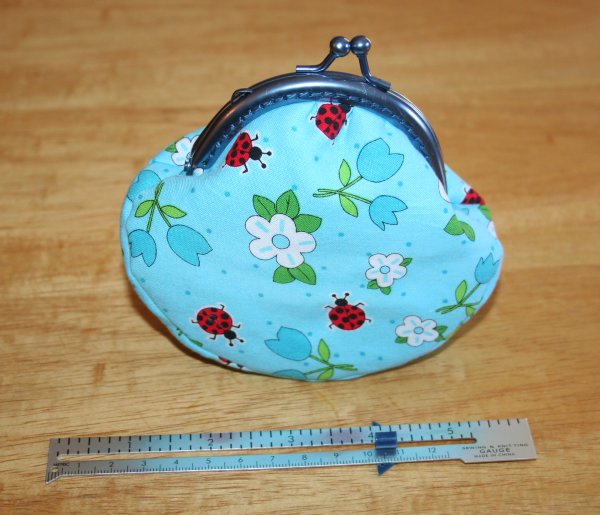
As mentioned above, I used a blue taffeta to line the purse.
I like the contrast between the cotton and the taffeta; a touch of elegance to add to the fun and cuteness of the ladybug print.
By the time I finished sewing the frame to the purse; I’d pretty much had all the sewing I wanted for the evening so I called it a night.
I’ll work on the table runners over the weekend. Now I’m off to see what everyone else worked on last night.



19 Comments
Nicky
September 20, 2011 3:19 pmCute purse Supermom! Thanks for leaving a comment on my blog but you are coming up as a no-reply blogger so I hoped over here to say hi! My quilt was started in 2005 so you can guess that I’m looking forward very much to the finish! Thanks for dropping by!
Beth H
September 20, 2011 9:10 amAdorable! I’ve always wanted to make one of those, but had no idea how the purse was attached to the frame. Thanks for showing how it’s done.
Fiona
September 19, 2011 8:31 pmThe purses are fantastic… well done you for working out how to do those frames… I can manage plain straps so far!!! Love the little bugs on your purses….. love love love them…
Hugz
Sandra :)
September 19, 2011 2:18 pmI’m going to chicken out even more than Nancy, and let her do the first trial, so she can teach me, LOLOL!!! Cotton lining here too – I’m too nervous for something slidey! Your little bag is quite delicious – let me/us know what kind of frame(s) you want from QAB!
Nancy
September 19, 2011 12:59 pmHoly Cow!
All those pins makes the purse look like something from a sci-fi movie, but I gotta say that’s exactly what I am going to do when I get to making mine. What a lovely finish too!
I am going to chicken out and make a cotton lining, but I agree, yours is very elegant. Now you get to go around saying, “Thank you, I made it myself!”
Cheers!
Briarside Lane
September 19, 2011 10:05 amThat’s sooooo cute! Thanks for visiting me, too.
Have a great week! …Karen
Rosieh
September 19, 2011 4:38 amThat is adorable, but looks soooo fiddly.. You did well to hang in there and finish it off..
Robin (rsIslandCrafts)
September 18, 2011 4:05 pmSuch an adorable little purse! I’ve never seen the frames where you can sew them on, I’ve only seen the kind where you glue the fabric into the frame. Sewing sounds more durable to me.
Sandy Rowe
September 18, 2011 4:13 pmWhat a cute little purse! I don’t have the patience for working on a project that requires me to think too much! LOL Thanks for stopping by. I love FNSI!
Gina
September 18, 2011 4:00 pmOh! They are so pretty!
Nina Lise Moen
September 18, 2011 3:34 pmYou did a great job on your purse, it is so cute. Sewing fabric onto anything metal is really difficult. The pinning was a very good idea indeed!
Thanks for stopping by my blog, I had to pop by and check out Super Mom’s blog you know.-)
Debbie
September 18, 2011 10:47 amVERY cute! I cannot even imagine how you manage to sew that metal frame on – yikes! You did good to hang in there & get it done. It looks great!
dawn
September 18, 2011 12:45 amVery cute little purse. Great problem solving!
Maria
September 17, 2011 11:32 pmLOL I think I would have had word too but it is well worth the finish.
Very cute.
Snippets & Yarns
September 17, 2011 11:17 pmThose are so cute!!
donna
September 17, 2011 9:15 pmYour little purse is so cute. Love the fabrics. Thank you so
much for visiting me. It is good to meet you. I would love to
follow your blog but I am not sure how.
Hugs
donna
Kirsten
September 17, 2011 7:53 pmAdorable purses. I hope you didn’t stab yourself with the pins. Cheers, K
Manda
September 17, 2011 4:29 pmThat is a cute purse! The ladybug fabric is perfect!
Comments are closed.